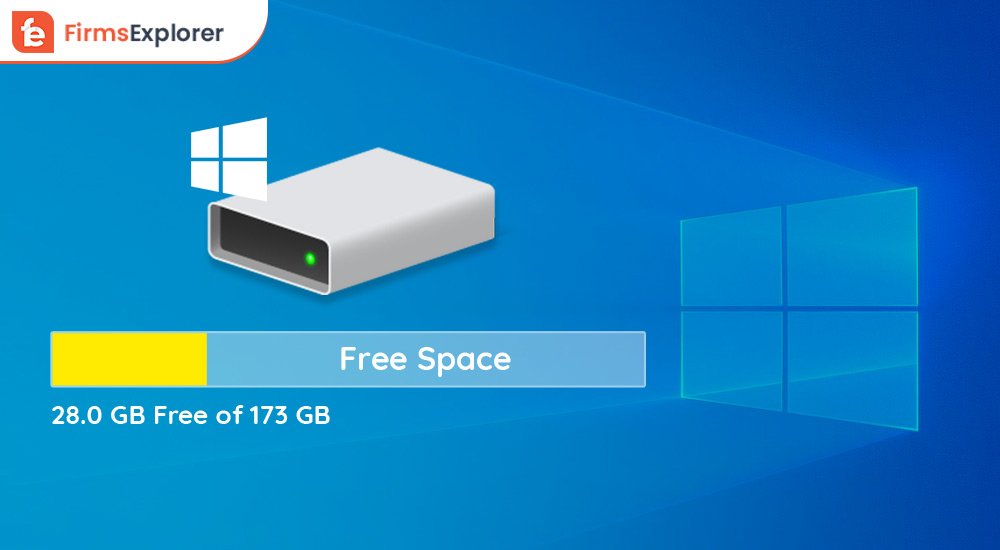
Eventually we get stuck in every kind of situation while working on the operating system. The problem we often caught is the low or no drive space issue. Freeing drive space not only solves your issue of removing the extra burden from the windows but also optimizes its overall performance.
Windows 10 delivers many options to free up the drive space on c drive when your hard disk is filled up. When the disk space is about to be completed, during the transfer of data the windows pop up the warning. It is the time we need to take action and free up some space so that the system runs without a worry. Hard disk contains plenty of bytes of space, but we still suffer from the problem of low space in the hard disk.
For rectifying this issue we have enlightened you with some of the best ways to free up drive space in Windows 10. These solutions not only free up the unnecessary space but also deletes the junk and temporary files, applications and games to optimize the device storage. After cleaning up the space, opt for the regular updates to keep your system in the best condition.
Below we are going to explain about 13 best tools and help you one by one so you need not to stumble upon during any process. You may choose according to your choice and free up file space on an external hard drive in no time. Let’s proceed with the easiest solution first.
1. Free Up Drive Space in Windows 10 via Recycle Bin
We might think that just clicking on the delete button will end up deleting the files from the system as well, but it’s not true. That data is available inside the recycle bin folder which holds around ten percent of “c disk” space. To free up space on c drive the other step would be to clean up the recycle bin as well.
To empty the recycle bin we need to follow below steps:
- Go to Start button
- Search for Recycle Bin and hit Enter
- Just click on the Recycle Bin tools tab.
- At the top left corner just press the Empty recycle bin and click the Yes button.
This way you can smoothly clean up your entire recycle bin with just a few clicks.
Shortcut: Press Shift+Delete to empty the entire Recycle Bin from the Windows.
2. Freeup Drive Space in Windows 10 via Disk Cleanup Tool
This is the another option you can opt for free up space on c drive including the temporary files. Recycle Bin only removes the files you have not required for now and already deleted but not able to delete the inside cache memory or temporary files. For this there is a legacy tool in Windows 10 known as Disk Cleanup.
Below are the steps for free up disk space using disk cleanup:
- Go to the Start button.
- Check disk cleanup tool(by default available), then hit enter.
- Window pop up containing “drive and more options” tab. Inside the “c-drive” dropdown menu hit ok.
- Delete the cleanup system files.
This way we can delete all the system files with a single click. If you need to specifically delete some of the files then follow the below steps. - Inside the “c-drive” dropdown menu, choose the files you want to delete. Click on the options.
- Windows Update Cleanup
- Temporary Internet Files
- Device Driver packages
- Temporary Files
- DirectX Shader Cache
- Downloaded Program Files
- Recycle Bin
- Previous Windows installation
Sometimes we need to delete the previous version of files including the old system restore and shadow copies to free up drive space in windows 10. This too can be deleted using the disk cleanup tool.
- Go to start button
- Search “disk cleanup” and hit enter.
- Under the drives option, open the “more options” tab
- Choose the “system restore and shadow copies” section and select the cleanup button.
- Click ok and delete it
After completing the above steps you are able to clean up the temporary files, restore point images and shadow copies from the system.
Also Read: How to Get Help in Windows 10 | Windows 10 help for Free
3. Freeup Drive Space in Windows 10 via removing unnecessary Apps and Games
Many times we have unknowingly installed so many applications and games which will end up covering the entire disk space. Windows updates regularly provides new updates and if we have chosen the “Update all” option then it will update all of the updates in the background when we are not even aware of this. So it’s good advice to keep the updates only for the most important applications to free up drive space of your system space and optimise its stability.
For uninstalling such unnecessary apps you must follow below steps and free up drive space in Windows 10.
Deleting the Apps
- Click the “Start” button.
- Search for the Settings option.
- Choose the Apps category.
- Select the “Apps and features” tab.
- Now, from the dropdown menu, sort by ”size” and filter by “all drives” options.
- Pick the list of items you want to remove.
- Click on the Uninstall button.
- Click again Uninstall for confirmation.
You have to repeat the same steps from 6 to 8, until you want to delete the unuseful apps.
Deleting the Offline Maps
- Click on the “Start” button.
- Search for Settings.
- Under the Apps list, choose the “Offline Maps” section.
- Under this select “delete all maps”.
- Click the delete all button.
This way you can remove some of the space from the drive. During the installation of Windows 10, it may install some of the language packages, which take up some hard drive space. To free up drive space, you need to follow these steps.
Delete the secondary Languages
- Click on the “Start”.
- Search for settings
- Choose the “Time and Languages” section.
- Click on the “Language”
- From the preferred languages category, click right to the options you need to delete.
- Click on the remove button.
- Repeat the steps 5 and 6 till you want to remove as many languages.
Inside your computer you may have some of the optional features you wish to delete( like windows hello face, windows media player, math recognizer and many more). Just follow these steps to easily delete all of the useless apps.
- Click the “Start” button.
- Search for the Settings option.
- Choose the Apps category.
- Select the “Apps and features” , there is an “optional feature” button. Click on it.
- Now, from the dropdown menu, sort by ”size” and filter by “all drives” options.
- Choose the installed feature.
- Click on the Uninstall button.
- Repeat the steps 6 and 7, if you want to remove more such features.
4. Freeup Drive Space in Windows 10 via NTFS Compression
You can go for NTFS(new technology file system) to compress the size of the files, folders in the Windows computer to free up drive space in Windows 10. Although compression degrades the quality of files and other documents. So this feature is not usually recommended. By apprehending this feature you would not need to zip up your files later.
How to Enable Folder Compression?
Follow the below steps to enable this:
- Click on Start
- Search for File Explorer.
- Choose the folder you need to compress.
- Right click on it and select the Properties option.
- Now, click on Advanced option.
- Under the Advanced Attributes pop up window, inside the compress or encrypt attributes, check on the Compress contents to save disk space option.
- Hit the OK and click on the apply button.
- Now, Select the checkbox to Apply changes to this folder, subfolders and files option, then click Ok and again OK to confirm.
It will take some time to compress if the file size is longer than expected. This process will enable file compression for the future files, folders and documents to free up drive space. - If you NO longer wish to enable this feature, follow the above steps and revert the 6th step by clearing the check box of Compress contents to save disk space option.
How to Enable Drive Compression?
Follow the below steps to enable the NTFS compression feature for the drives:
- Go to the Start button
- Search for File explorer
- Click on “this PC” and press ok.
- Under the Device and Drives, right click on the appropriate drive and select the properties.
- Check the option Compress this drive to save disk space.
- Click on apply and select the option Apply changes to drive (drive letter), subfolders, and files option.
- Hit the OK button and press OK again to confirm.
- If you wish to disable this option, revert the steps and clear the option Compress this drive to save disk space following the other steps.
Also Read: How to Get Help With File Explorer in Windows 10 (2021 Updated)
5. Freeup Drive Space in Windows 10 via disabling Hibernation
Hibernate uses less power than sleep and when you start up the PC again, you’re back to where you left off (though not as fast as sleep). This process could take some amount of computer memory. The information is saved in the file name hiberfil.sys file. To disable this feature, you need to follow the below steps.
- Click on the start button.
- Type the command cmd on the run box or search for Command Prompt and choose Run as Administrator option.
- Type the command inside the command prompt as : powercfg /hibernate off. Hit enter
- System starts processing and while the process ends the system disables the Hibernate option.
This free up drive space for your Windows PC and if in future you want to enable this feature revert the step 3 as: powercfg /hibernate on.
6. Freeup Drive Space in Windows 10 via Reducing Installation Footprint
Compressing the footprint of the operating system may cause a certain irreversible damage if not followed in a correct way. It is always best to perform such activity under some technical person supervision.
Warning: It is always recommended to take a full backup of the system before proceeding, to not undergo any kind of headache in future.
Compact OS is the tool used to operate compression of the footprint of Windows 10. Using this tool helps you to free up drive space of some gigabytes of space when you are short of external drive.
Below are the steps to compress the size of installation for Windows 10.
- Select the Start button.
- Type the command cmd on the run box or search for Command Prompt and choose Run as Administrator option.
- Type the command inside the command prompt as : compact.exe /compactOS:always. Hit Enter
The above process free up drive space upto 2 GB to 3 GB, without degrading the performance. - If you want to disable this process, you can always revert the same process and in step 3 use the command inside the command prompt as : compact.exe /compactOS:never. Hit Enter
7. Freeup Drive Space in Windows 10 via Space Rebuilding Search Indexer
There are often times when the disk space is running out. While performing the searching operation windows will acquire some space. It will allocate some of the database space for indexing. Windows 10 by default has this feature to quickly find any files or apps. It fully supports hard drive, ssd and external drive.
Indexing also supports customization so that you are easily able to exclude any folder or directory from being indexed and free up drive space in Windows 10. This feature is helpful if you have some drive which is rarely accessed. If you want to search a file with some specific word then indexing also allows you to search text files according to content.
Warning: Sometimes your index can get corrupted and that can negatively impact your performance.
Rebuild the index of Windows 10
- Select Start.
- Search for Settings.
- Inside the Windows left pane, click the Search.
- Select the “Searching Windows”.
- Now under the “More Search Indexer Settings” section, choose the Advanced Search Indexer Settings option.
- Inside the Indexing options window, click on the Advanced button.
- Click on the Index Settings tab on the left.
- Inside the Troubleshooting section, click on the Rebuild button.
- Then click OK.
The above steps will rebuild the index of Windows 10 and clear the extra space from the database.
Configure the indexing of Windows 10
We can easily configure the indexing of windows 10 and minimize the space using the below steps:
- Search for Settings.
- Click on Search.
- Under the left pane, click on Search.
- Click on “Searching Windows”.
- Now under the “More Search Indexer Settings” section, choose the Advanced Search Indexer Settings option.
- Click on the Modify tab on the right.
- Now click on the Show all locations button.
- Clear all of the options which you want to exclude from indexing.
- Expand the C drive and manually clear all of the options you want to not appear on the search results.
- Click on the OK button and Close the tab.
Once you have completed the steps, Windows 10 clears the indexing for the search results and hence, increases the system space.
Also Read: 10 Best Free Disk Management Tools for Windows 11, 10, 8, 7 PC
8. Freeup Drive Space in Windows 10 via Deleting No Longer Sharing Device
If you previously shared your device or installed some other device in your system and now it’s of no use, it only takes up your space, so it’s the right time you need to delete those devices or accounts to free up drive space.
Follow these simple steps to get remove any shared accounts from your system:
- Open the Settings bar.
- Click on the Accounts tab at the left pane.
- Under the Family and other users section, select the type of account you wish to remove.
- Now, click on the Remove button.
- Click on the Delete account and data button to remove the account.
- Repeat the steps till you want to remove the unnecessary accounts.
9. Freeup Drive Space in Windows 10 via Disabling Reserved Storage
Windows reserves some part of memory for upcoming updates, system cache, and temporary files. System updates are useful while they acquire a lot of memory space. To overcome this, we can opt for disabling the reserved storage to free up drive space in Windows 10. Although it is not recommended to disable this feature. It’s an important feature useful for maintaining the performance of a system. But if you want to do this then take proper precautions because any mistake will lead to system failure.
You will only see the free space once the new update will be available.
Below are the steps for disabling Reserved Space
- Click on Start.
- Search for PowerShell, right click on it and select Run system as administrator option.
- Now, inside the powershell window type the command as : Get-WindowsReservedStorageState, and press Enter.
- Type the below command to disable the feature of reserved storage: Set-WindowsReservedStorageState -State disabled, and press Enter.
These steps will clear up your system’s reserved storage space and free upto 7 GB of space once the next feature is available.
10. Freeup Drive Space in Windows 10 via OneDrive files on Demand
OneDrive files on demand feature helps to put all of your files and available them online. This feature is present by default but if not, then follow the below steps to enable this feature.
- Click on the OneDrive icon, reside at the bottom right corner of Windows 10.
- Select the Help & Settings option and click on the Settings.
- Under the pop up window, click on the Settings tab.
- Check the box Save space and download files as you use them, under the “File On-Demand” section.
- Press the OK.
After completing the above steps you are able to transfer the important documents to the OneDrive and use it online.
Convert the Local Files available only-online
To make the files available online, follow these steps:
- Click on Start.
- Open the File Explorer.
- Choose the OneDrive option from the left pane.
- Now select the files and folders you want to free their space.
- Then right click on the selection and choose the option to free up space.
This way you can free up the space upto 5 GB. Once you choose the subscription of the Microsoft 365, you can increase the limit to 1 TB.
11. Freeup Drive Space in Windows 10 via Relocating Content to External Drive
To resolve the issue of low space or running out of space, you can always plug in some of the external devices and shift the data into it to free up drive space in Windows 10. Simply selecting the folders and files you wish to relocate to some other location will expand the speed of your system as well as free up disk space.
How to free up File Space on an External Hard Drive?
Follow these steps to transfer your data into some new space and use it whenever you need.
How to move Files to External Device
- Open the File Explorer.
- Choose the folders and files you want to relocate to the external drive.
- Click on the Move to tab from the Home tab and select the Choose location option.
- From the pop up window, select the external drive.
- Click on the Move button.
- Repeat the same steps for moving other folders to the external drive.
Relocate the Apps and Games to External Drive
Windows allows you to transfer your apps and games to the external drive. First connect the external drive to the system and follow the below steps:
- Click on start
- Open the Settings
- Click on Apps
- Click on Apps & features.
- Select the sort by “size” option to identify the largest size apps and games available.
- As per your choice select the specific game and app you wish to move by choosing Move tab.
- Choose the new location.
- Click the Move button.
After you complete the steps, you may need to repeat the same instructions to move additional apps or games to the new location.
12. Freeup Drive Space in Windows 10 via Deleting Junk Files using Storage Sense
Junk files and temporary files often consume a large amount of space inside the system. We need to erase those files on a regular basis to create ample space for other important data to free up drive space in Windows 10.
How to enable StorageSense?
StorageSense is one of the best pc optimizers for Windows 10. We can easily enable it to prevent running out of space issues. Below are the steps to set up StorageSense automatically:
- Click on Start.
- Search for Settings.
- Click on System on the left pane.
- Now click on Storage.
- Turn on the Storage Sense.
- Inside the “Storage”, click the option Configure Storage Sense or run it now.
- Now, choose the “Run Storage Sense” drop-down menu and select the best option as per your choice(During low free disk space is recommended).
After completing all the steps, StorageSense will run automatically as per the schedule. This feature only activates the default settings but not completely removes the unwanted files.
How to delete Unwanted Files using StorageSense?
We can configure StorageSense to delete the unwanted files using the following steps below:
- Click on Start.
- Search for Settings.
- Click on the “System” in the Windows left pane.
- Now select the Storage.
- Turn on the Storage Sense.
- Inside the Temporary Files section.
- Check on the Delete temporary files that my apps aren’t using option.
- Select the dropdown menu of Recycle Bin and delete the files which are available more than the specified time.
- Select the dropdown menu of Downloads and delete the files which have downloaded from the internet.
- Inside the “Locally available cloud content” section, choose the dropdown menu to free up the space used by the cloud content from the device.
- Inside the “Free up space now” section, click on the checkbox to Delete previous versions of Windows option( this will release around 20 GB of your system’s space).
- Click on Clean now.
How to delete Temporary Files using StorageSense?
- Click on Start.
- Search for Settings.
- Click on the “System” in Window’s left pane
- Now click the Storage.
- Inside the Windows (C) section, click the option Temporary files.
- The dropdown list contains several items, from the list choose the item you wish to delete.
i. Temporary Files
ii.Microsoft Defender Antivirus
iii. Previous Windows installation
iv. Downloads
v. DirectX Shader Cache
vi. Windows error reports - Click on the Remove Files button, to delete all of the files.
- This process will delete all of the files permanently.
View the Storage Usage of Windows 10
StorageSense gives the facility to view all the contents inside the storage space and delete the files according to the maximum size of files.
Below are the steps to view the storage usage on Windows 10:
- Click on Start.
- Search for Settings.
- Click on System on the left pane.
- Now click on Storage.
- Inside the Windows C: section, click on the Show more categories option.
- The storage is utilised by the number of files, apps, games, maps and for system reserved areas(space consumed by virtual memory, system restore, new updates and hibernation files).
- Select each category to select even more details.
StorageSense will give you the ability to better understand the storage space, its usage and helps to free up the reserved space efficiently.
Also Read: How to Repair and Restore Windows 10 (Complete Guide)
13. In addition to all of these ways you can free up your disk space by uninstalling antivirus software which causes any kind of malware problem. In that case you can remove the software which may cause low performance of the system to free up drive space in Windows 10.


