Have you recently installed Windows 10 or updated your existing Windows operating system version and noticed that sound stopped working on your computer? If this is the case, then it’s likely that you are facing a Realtek Audio Not Working issue, and we have come up with a few simple solutions that can fix the problem.
The Realtek Audio driver that comes with your computer may not work correctly. You have a problem if you experience no sound coming out of the earphones, headphones, or speakers despite the volume being turned up. This is a widespread problem faced by most people nowadays due to other reasons. In this post, we will show you how to fix this issue. Just check all the methods we mention and apply them to your computer.
Fix Realtek Audio Not Working Issue in Windows 11, 10, and Older Versions
Now Fix Audio Playback Sound Problems easily. Here are the detailed Step-by-Step instructional methods on how to fix the problem of Realtek Audio Not Working in Windows 11,10, 8, 7.
Bonus Tip: Realtek Audio Not Working on Windows PC? Meet Bit Driver Updater, the free device driver scanner that finds the correct driver for your device and makes updating your drivers easy as a breeze. All you need is an effective tool to detect outdated or broken drivers on your computer. Download Bit Driver Updater with the button below.
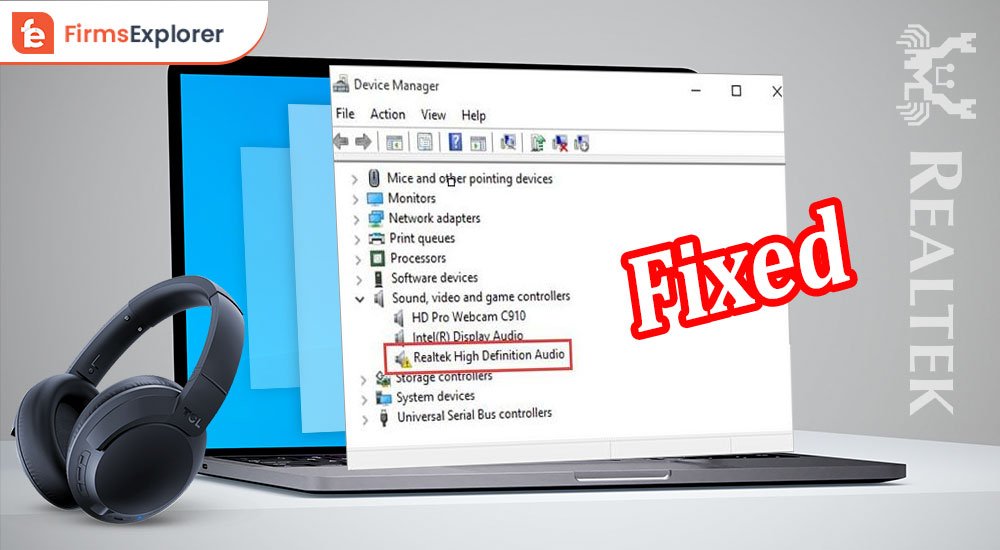
Fix 1: Reinstall Realtek Audio Drivers if Realtek Audio is not Working
Your headphones, mic, and speakers all stop working. It’s not a threatening issue, but still annoying enough to ruin your day. The uninstaller that comes with Windows will do a decent job of removing all the old, broken drivers. Here are the further steps to uninstall Realtek Audio Drivers and update the USB Audio driver on your PC.
- Press Windows+X.
- Choose Device Manager from the context menu.
- Find and double click on ‘Audio inputs and outputs to expand it.
- Right-click on the Realtek Audio Drivers and choose Uninstall device.
- A new pop-up window will appear with the option to Uninstall.
- Choose Uninstall, and your Realtek Audio Drivers will be uninstalled.
- Restart your PC.
- The system will automatically reinstall default Drivers.
If you do not find this method easy or think it is time-consuming, go to the following suggested manual way to fix Realtek Audio not working.
Fix 2: Switch the default sound format to solve Realtek Audio Not Working
When you find your Realtek Audio manager is missing, you must aid it. By default, the system setting of Sound is set to Microsoft Sound Mapper, which is an acceptable format for most people. However, if you are looking for a richer experience with better sound effects and clarity, then it’s recommended you switch the output format to 24-bit PCM. Here’s how:
- On the bottom right corner, right-click on the volume icon.
- Choose Open Sound Settings.
- Under Sound<Output, look and click for Device Properties.
- Select Additional Device Properties.
- In the newly opened window, click on Advanced Tab.
- Tap on the Down Arrow and select the following options:
24bit/44100 Hz
24bit/192000Hz - Click on Apply, then Ok.
This process will restore sound drivers on your PC to the default. It still does not work; move to the next step.
Fix 3: Update your Realtek Audio Drivers with Device Manager
Sometimes the problem is not the audio driver software itself but the outdated driver version. If you’ve identified that to be your problem, then here’s a detailed tutorial on how to update your Realtek audio drivers with Device Manager. In Device Manager, you can ‘Fix Generic Audio Driver Problem by changing the generic drivers.’
- On your PC, Press Windows+X together.
- In the context menu, choose Device Manager.
- Click on Audio inputs and outputs.
- Double click on it to expand and select Realtek Audio.
- Right-click on ‘Realtek…’ and Choose Update driver.
- In the next window, choose the below option that says ‘Browse my computer for driver software.’
- Then select ‘Let me pick from a list of available drivers on my computer.’
- Choose the high-definition Audio driver from the given a list and click on the Next.
- After that, follow the onscreen instructions.
- You will get the default sound drivers this way.
Fix 4: Turn Off the Microsoft UAA Bus Driver
One of the most popular audio driver updaters is the Microsoft Universal Audio Architecture (UAA) Bus Driver. For whatever reason, you can’t install Realtek audio drivers for some versions of Microsoft’s Unified Audio Architecture Bus driver (UAA). Learn how to turn that pesky driver off.
- Go to the Device Manager by searching for it on the search bar.
- Look for System Devices.
- Double click on it to expand and choose ‘Microsoft UAA Bus Driver.’
- If you do not see it in the list, it is already disabled.
- But if you see it, right-click on it and choose Disable device.
- Reboot your PC and check if the ‘Realtek Audio not working’ issue has been fixed.
Fix 5: Restart Windows Audio Services
To Fix: Audio Services Not Responding, you can try this another method. Here are the steps to enable Windows Audio Service.
- Press Windows+R.
- Put the command’ services.msc.’
- Hit enter.
- Find Windows Audio Service.
- Right-click on it.
- Choose Properties.
- Click on the down arrow that you can find next to the startup type.
- Choose Automatic.
- Then Start<Apply<Ok.
- You will only have to restart the service if it is currently running and set to Automatic. To do so, seek Windows Audio service, right-click it, and Restart your PC.
Fix 6: Disable Audio Enhancement in Your Device
While updating audio drivers, it is recommended to disable the audio enhancement to update your Realtek audio drivers. Disabling allows you to update directly without rebooting or installing the updates again. If you have a problem updating the Realtek audio drivers, you can use the instructions below to fix it. The next time you try to update your audio drivers, disable the device’s audio enhancement.
- Right-click the Volume icon on the right bottom corner of your PC.
- Pick Open Sound settings.
- Choose Device properties.
- Click on the Additional device properties.
- You will see a new window now.
- Click the Enhancements tab.
- Uncheck the box which you see next to Disable all enhancements.
- Click on Apply.
- Press Ok.
Fix 7: Use Bit Driver Updater to Fix Realtek Audio Not Working Problem in Windows 11/10 and Older Version
Suppose you have tried all of the fixes and still your computer is acting up, and you’re encountering issues with your Realtek audio device. In that case, Bit Driver Updater will do a deep scan of your system to find any existing and new drivers that aren’t working correctly. In addition to updating outdated and incompatible drivers, the program will also repair missing or damaged registry entries that are causing your audio driver trouble.
Bit Driver Updater will automatically recognize your system, find the correct drivers for your devices, and then optimize them for performance and stability. Here is how Bit Driver Updater can ‘Fix Multimedia Audio Controller Driver errors.’
- Download the Bit Driver Updater by hitting on the download button below.
- Run and launch the app on your system.
- On the left side, Click on Scan Now.
- Now let the Bit Driver Updater work magically by scanning your old drivers.
- It will scan the drivers in a few secs; now, you may see the Update All option.
- Click on it, and you will get all the updated drivers.
- Restart your PC.
Now check if you have the ‘Fix of Audio Services Not Responding’ by starting any audio.
Wrapping Time:
You do not know ‘How to Fix Realtek Audio Not Working Issue in Windows 11, 10 and Older Version?’ We believe the key takeaway from this should be that Realtek audio drivers are essential if you have a functioning speaker system. They control what music or Netflix audio your computer receives, and they allow you to play it through your speakers.
Luckily, you have got this write up to update USB audio drivers. And, we have covered some easy fixes in the above write-up by which you can try to get them to work with Windows 10 again and as always, remember to back up your computer before making just about any risky changes like this.
Let us know more about your wisdom on this by commenting below. We love to listen to you a lot!


